Setting up Tasks
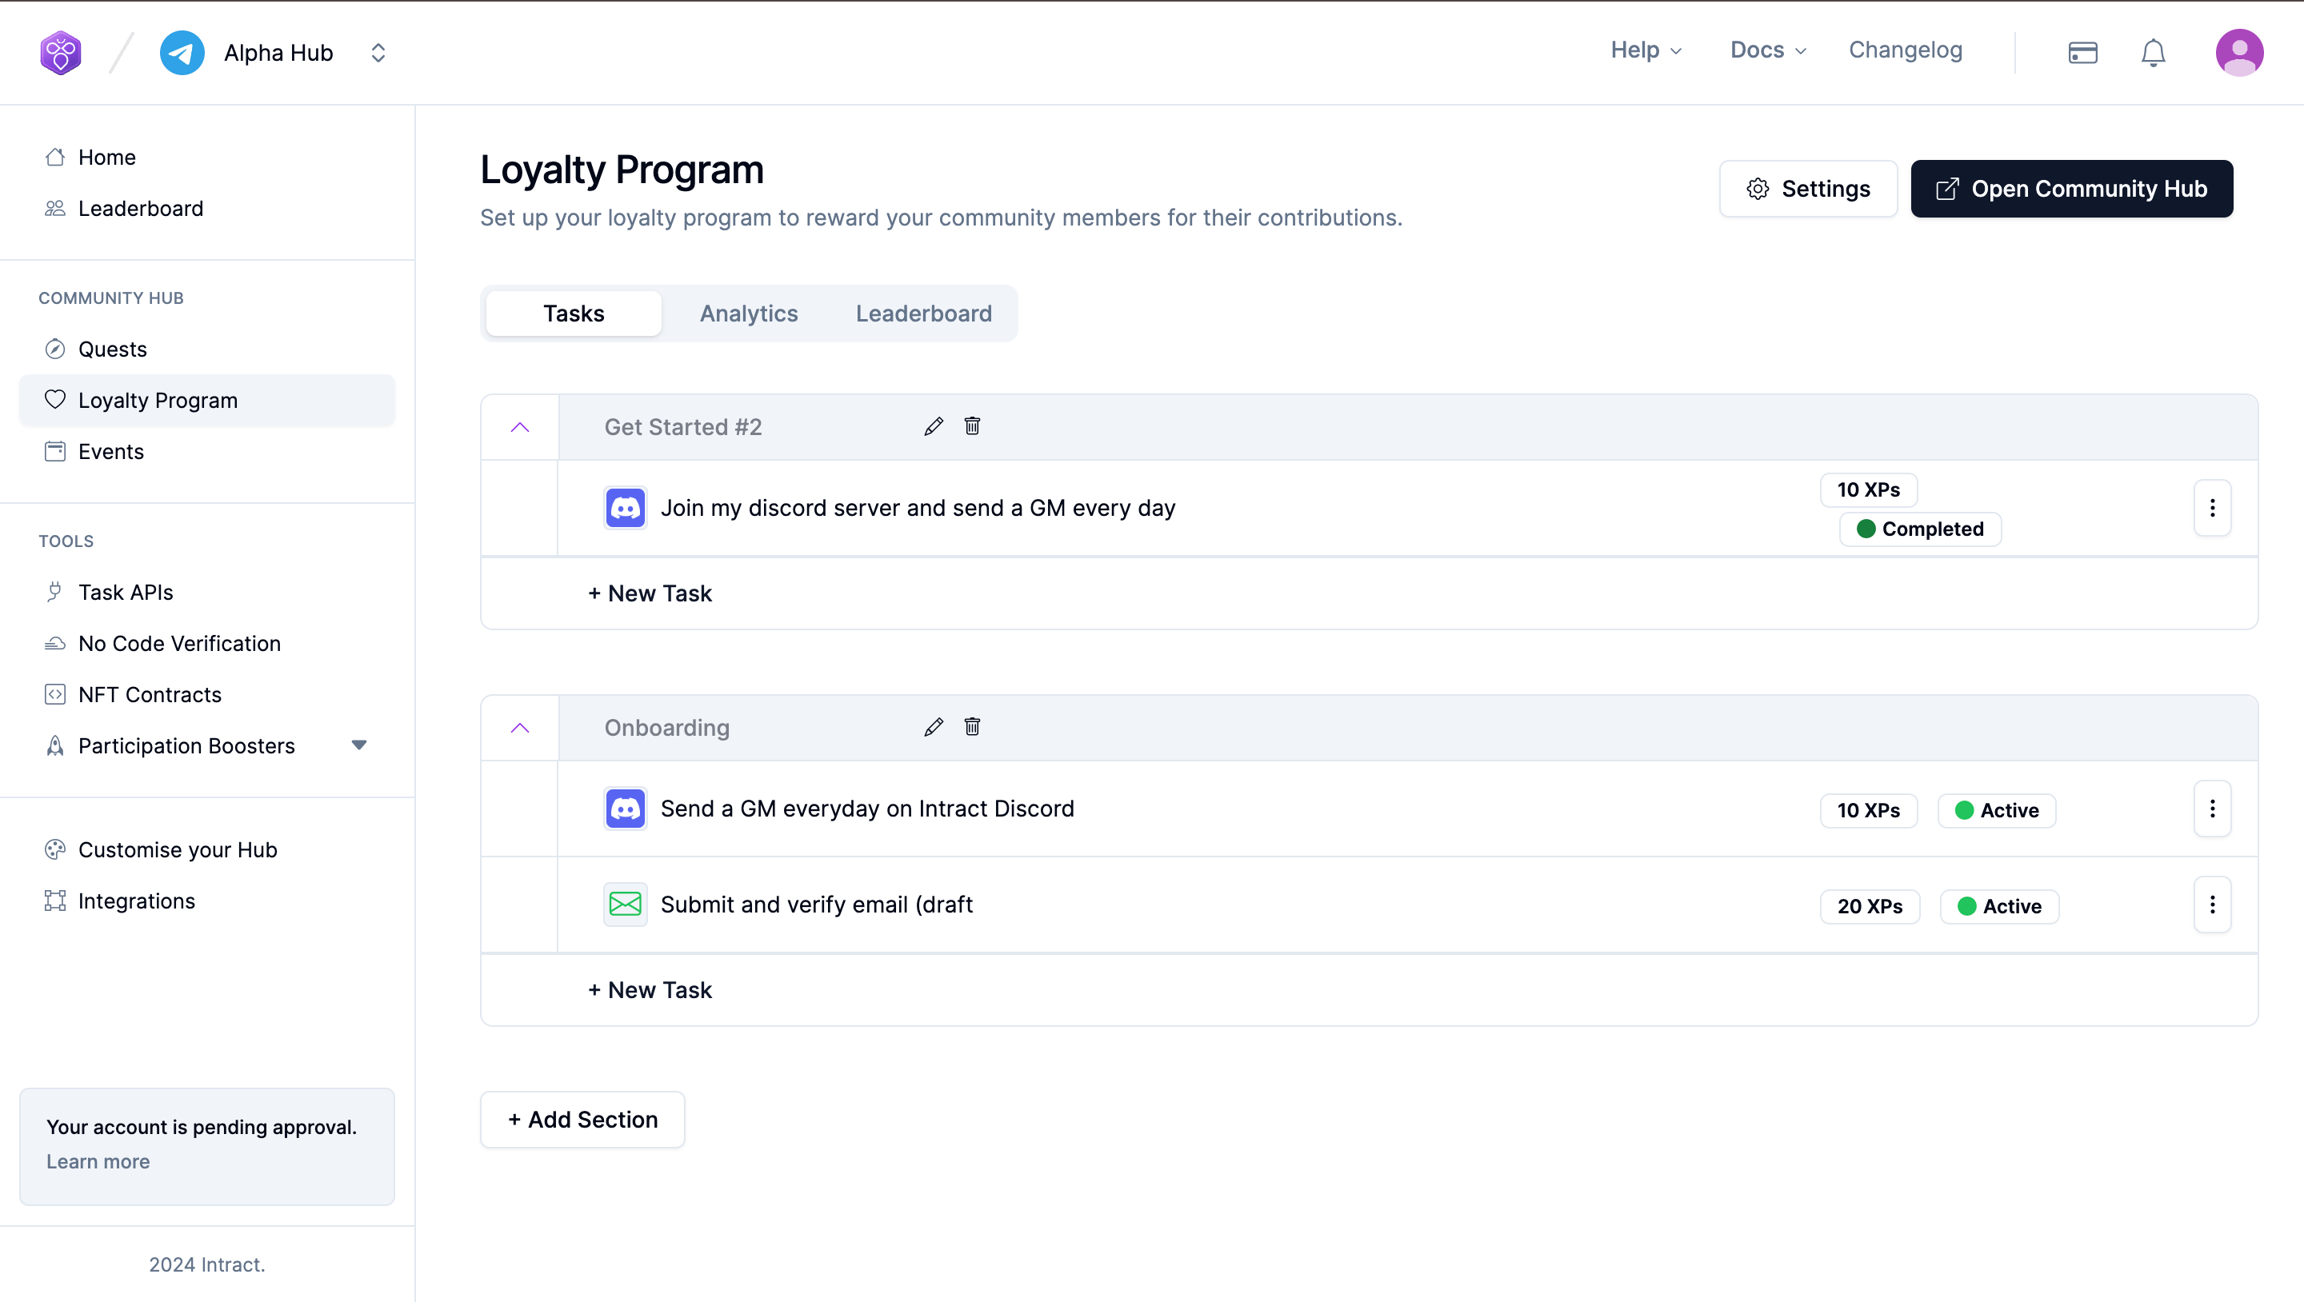
You've got a ton of options here to make this as fun as possible. You can set up tasks individually or group them together, it's totally up to you. For instance, you could create sections like 'onboarding' or 'try our product features'; Or you can just have a long list of tasks with no sections. Once you've figured out your task flow, you can easily select and add tasks.
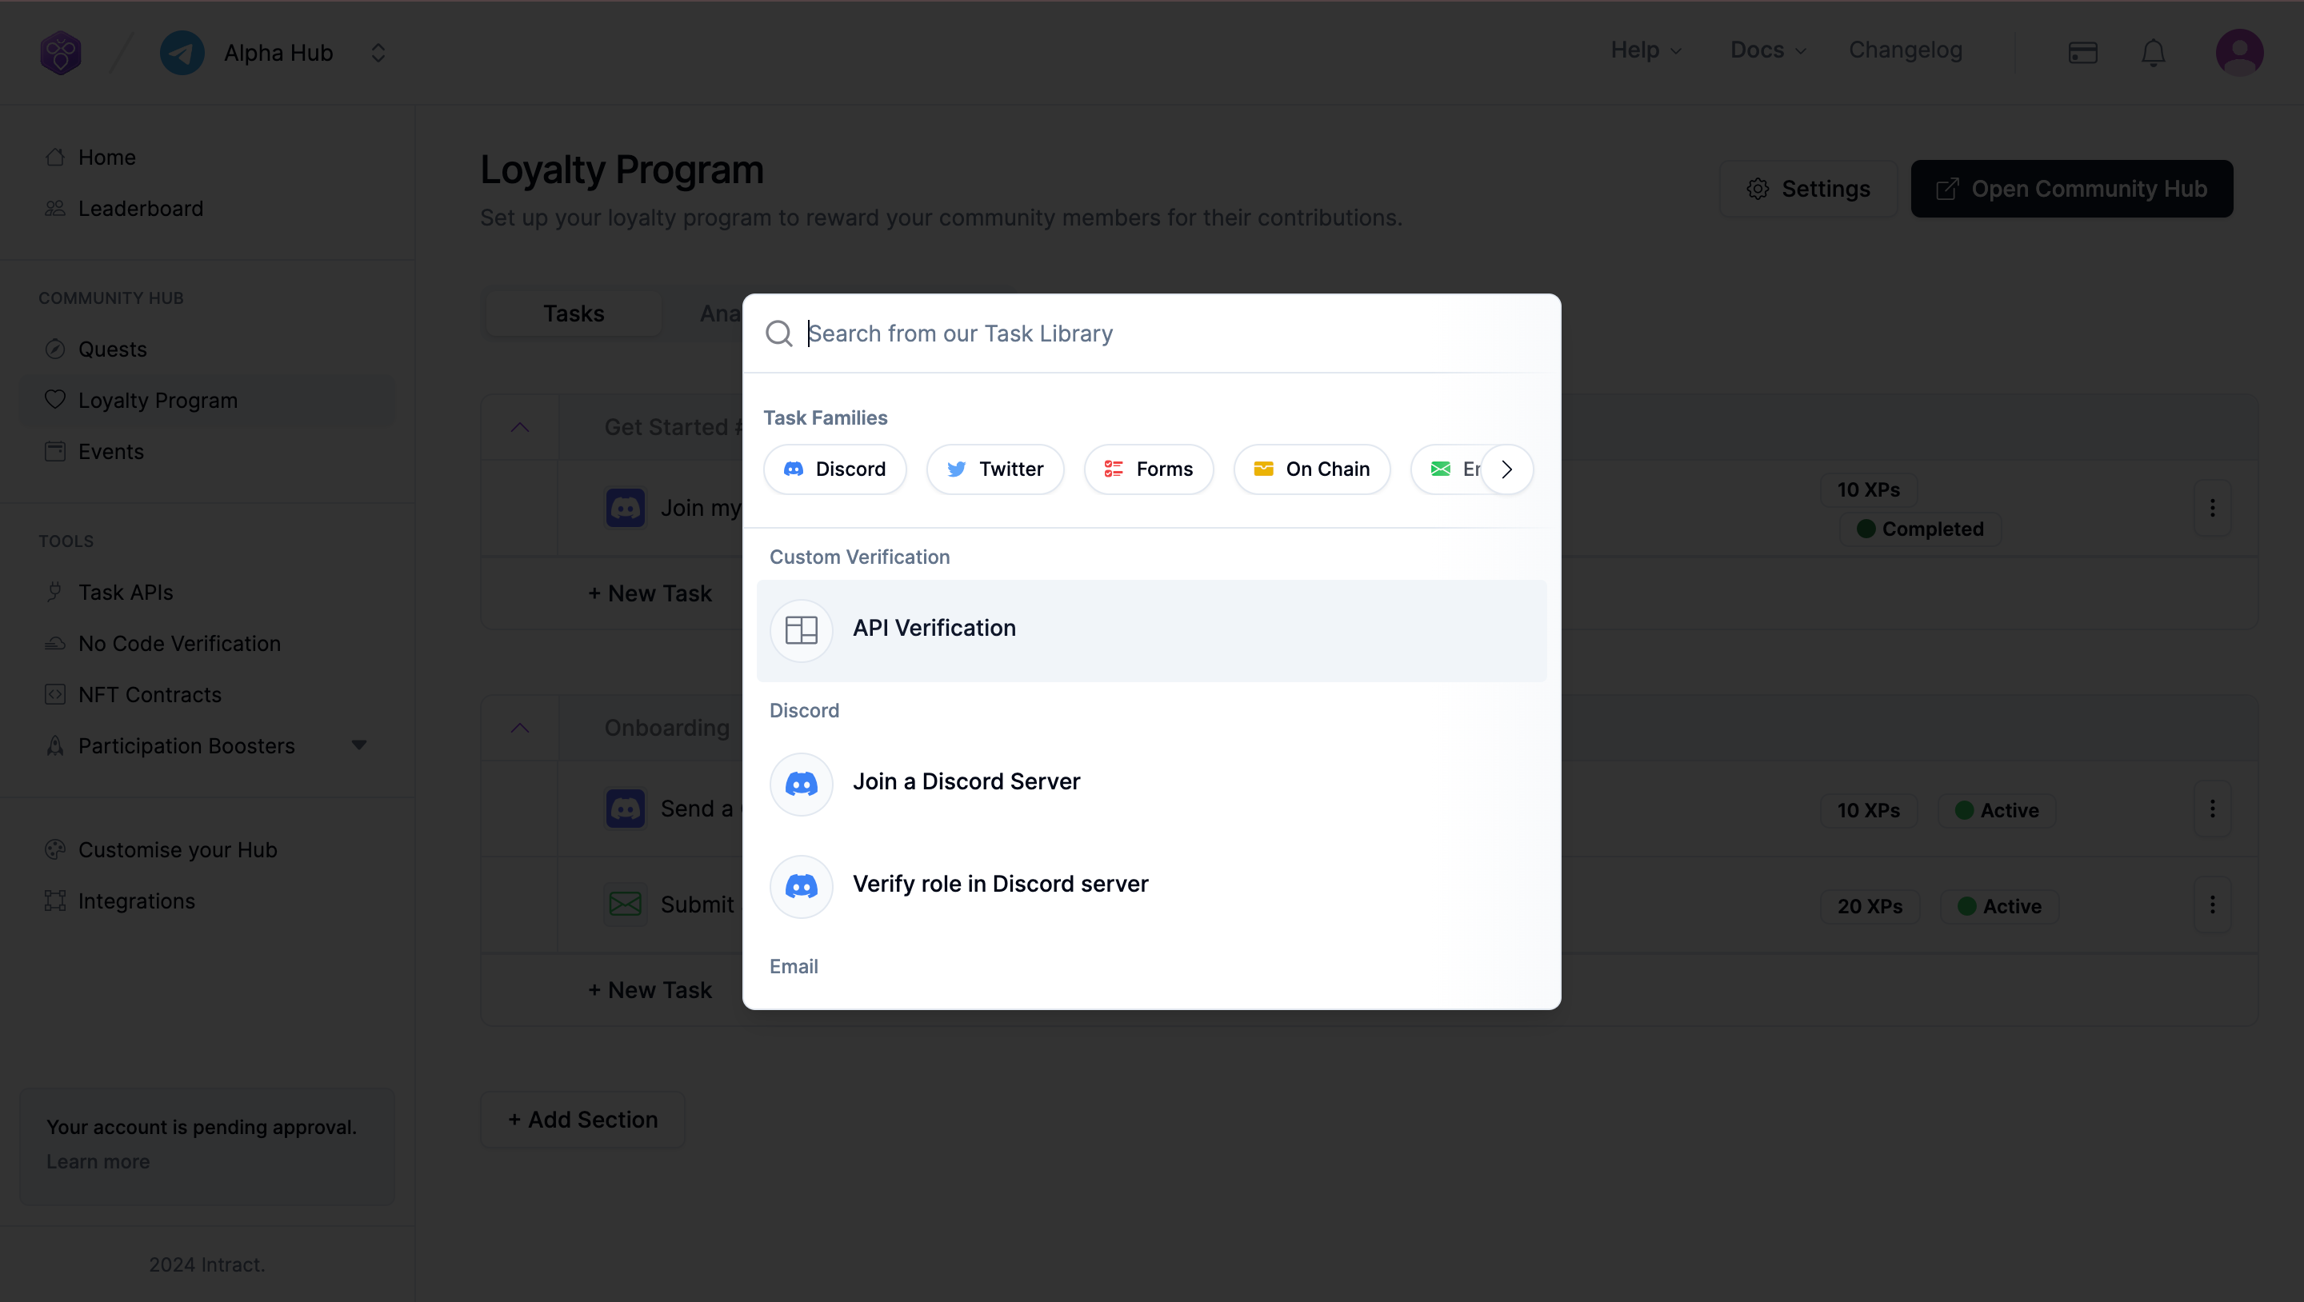
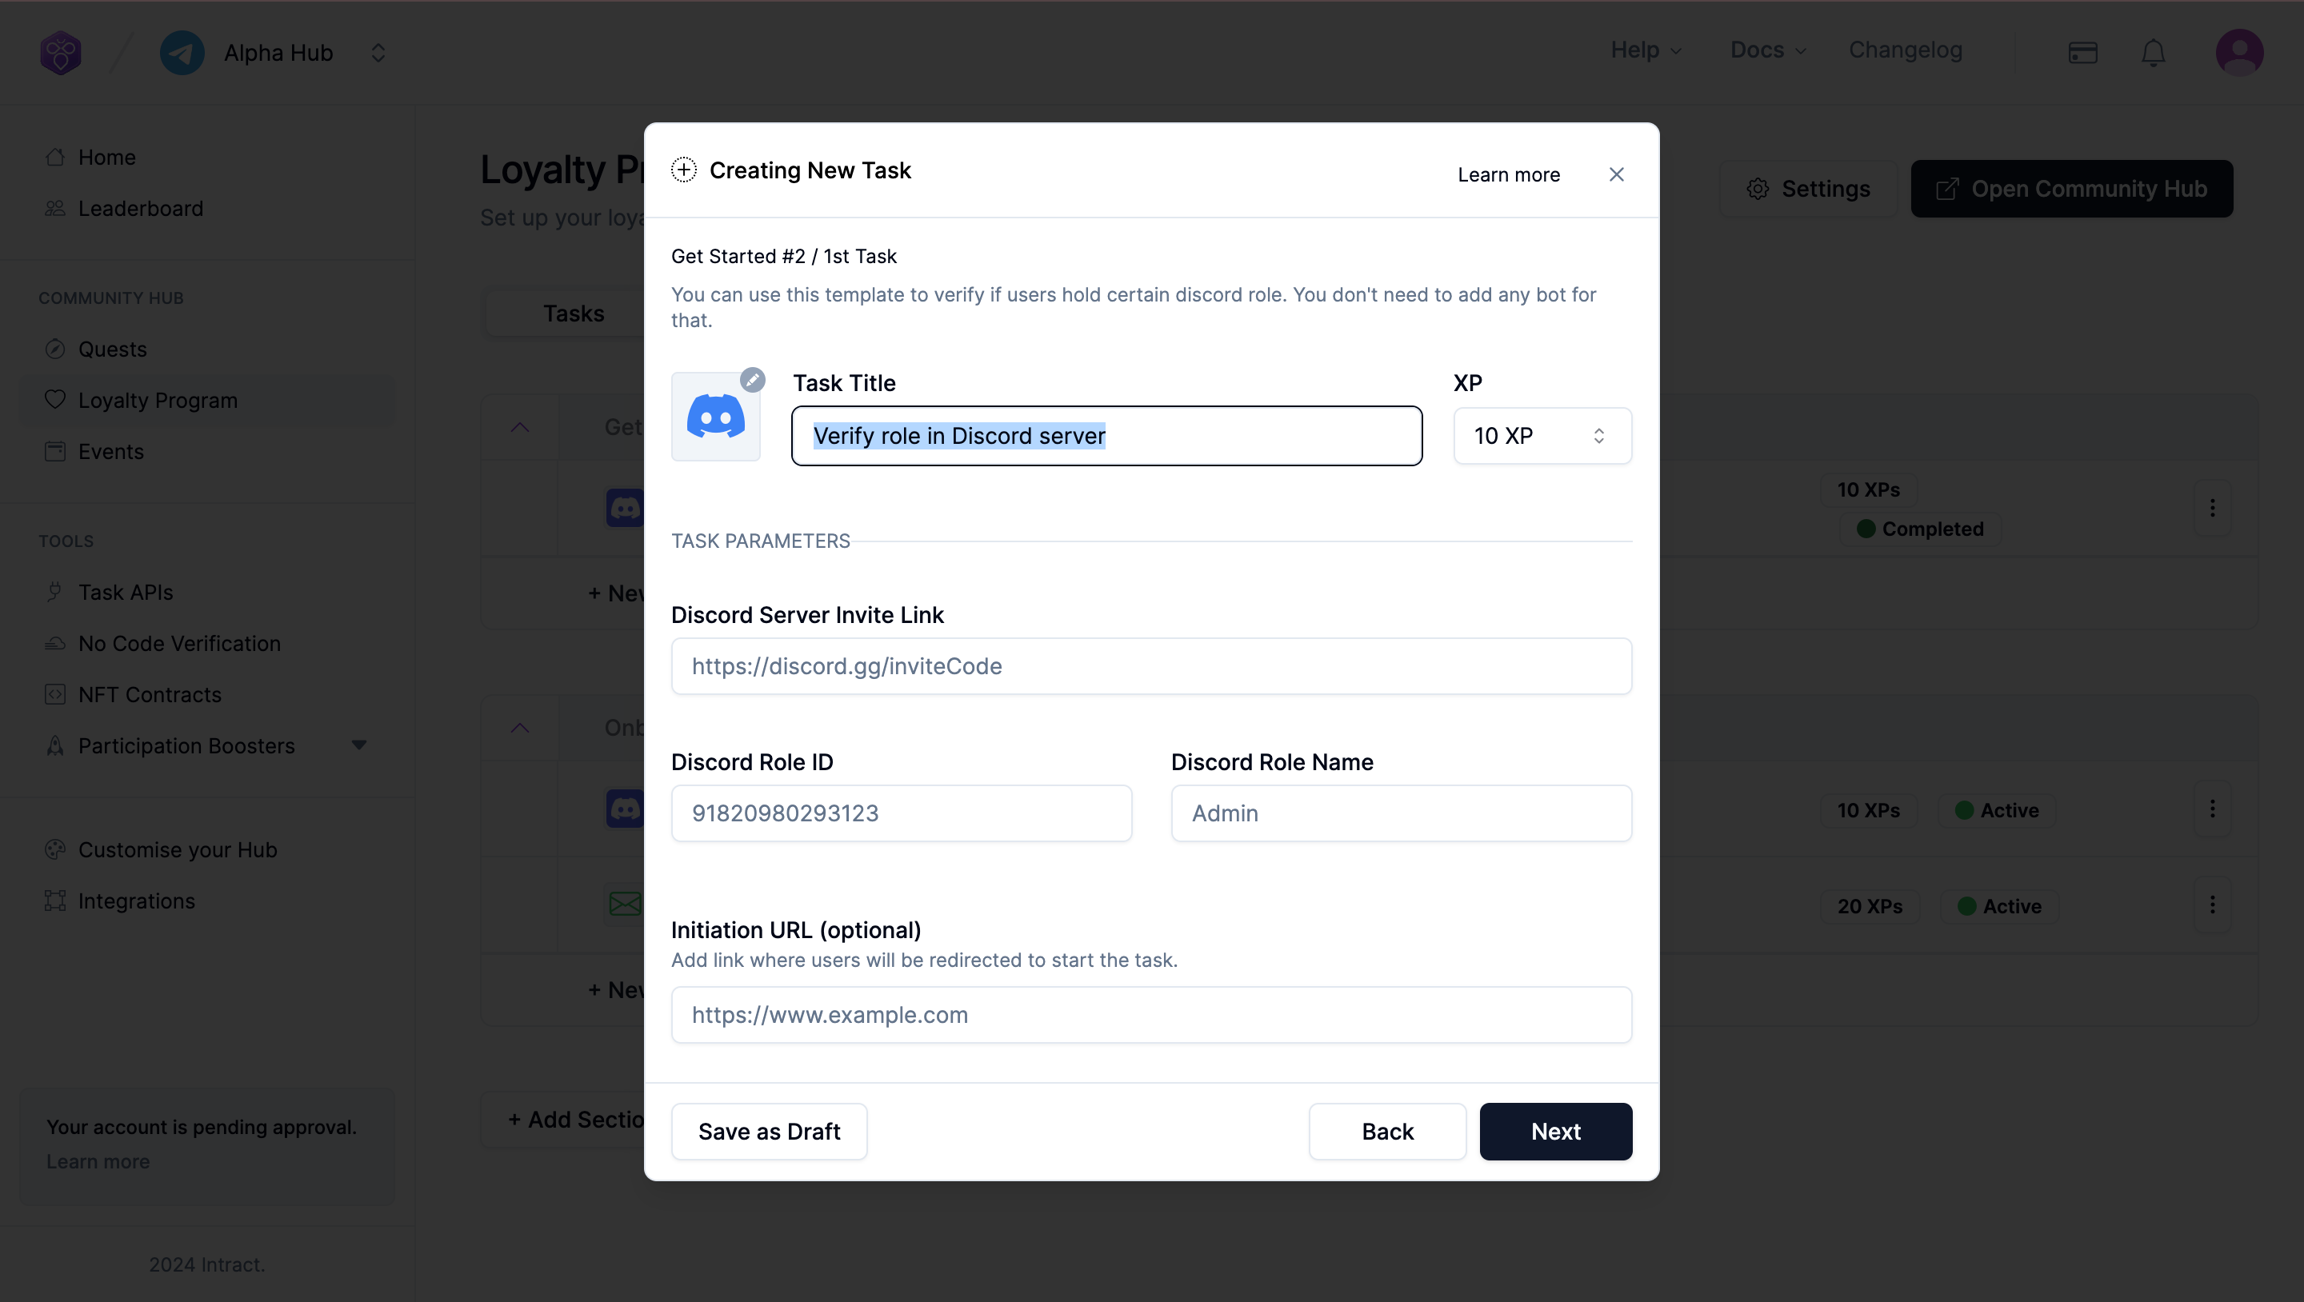
Our Task Library is neatly organized into task families for your convenience. Picking a task like "join discord server" is super simple. All you need to do is add the required task parameters, which will vary depending on the task, and set the rewards.
For tasks requiring API verification, you'll first need to integrate APIs. If you're not sure how to do that, just click here, we've got you covered.
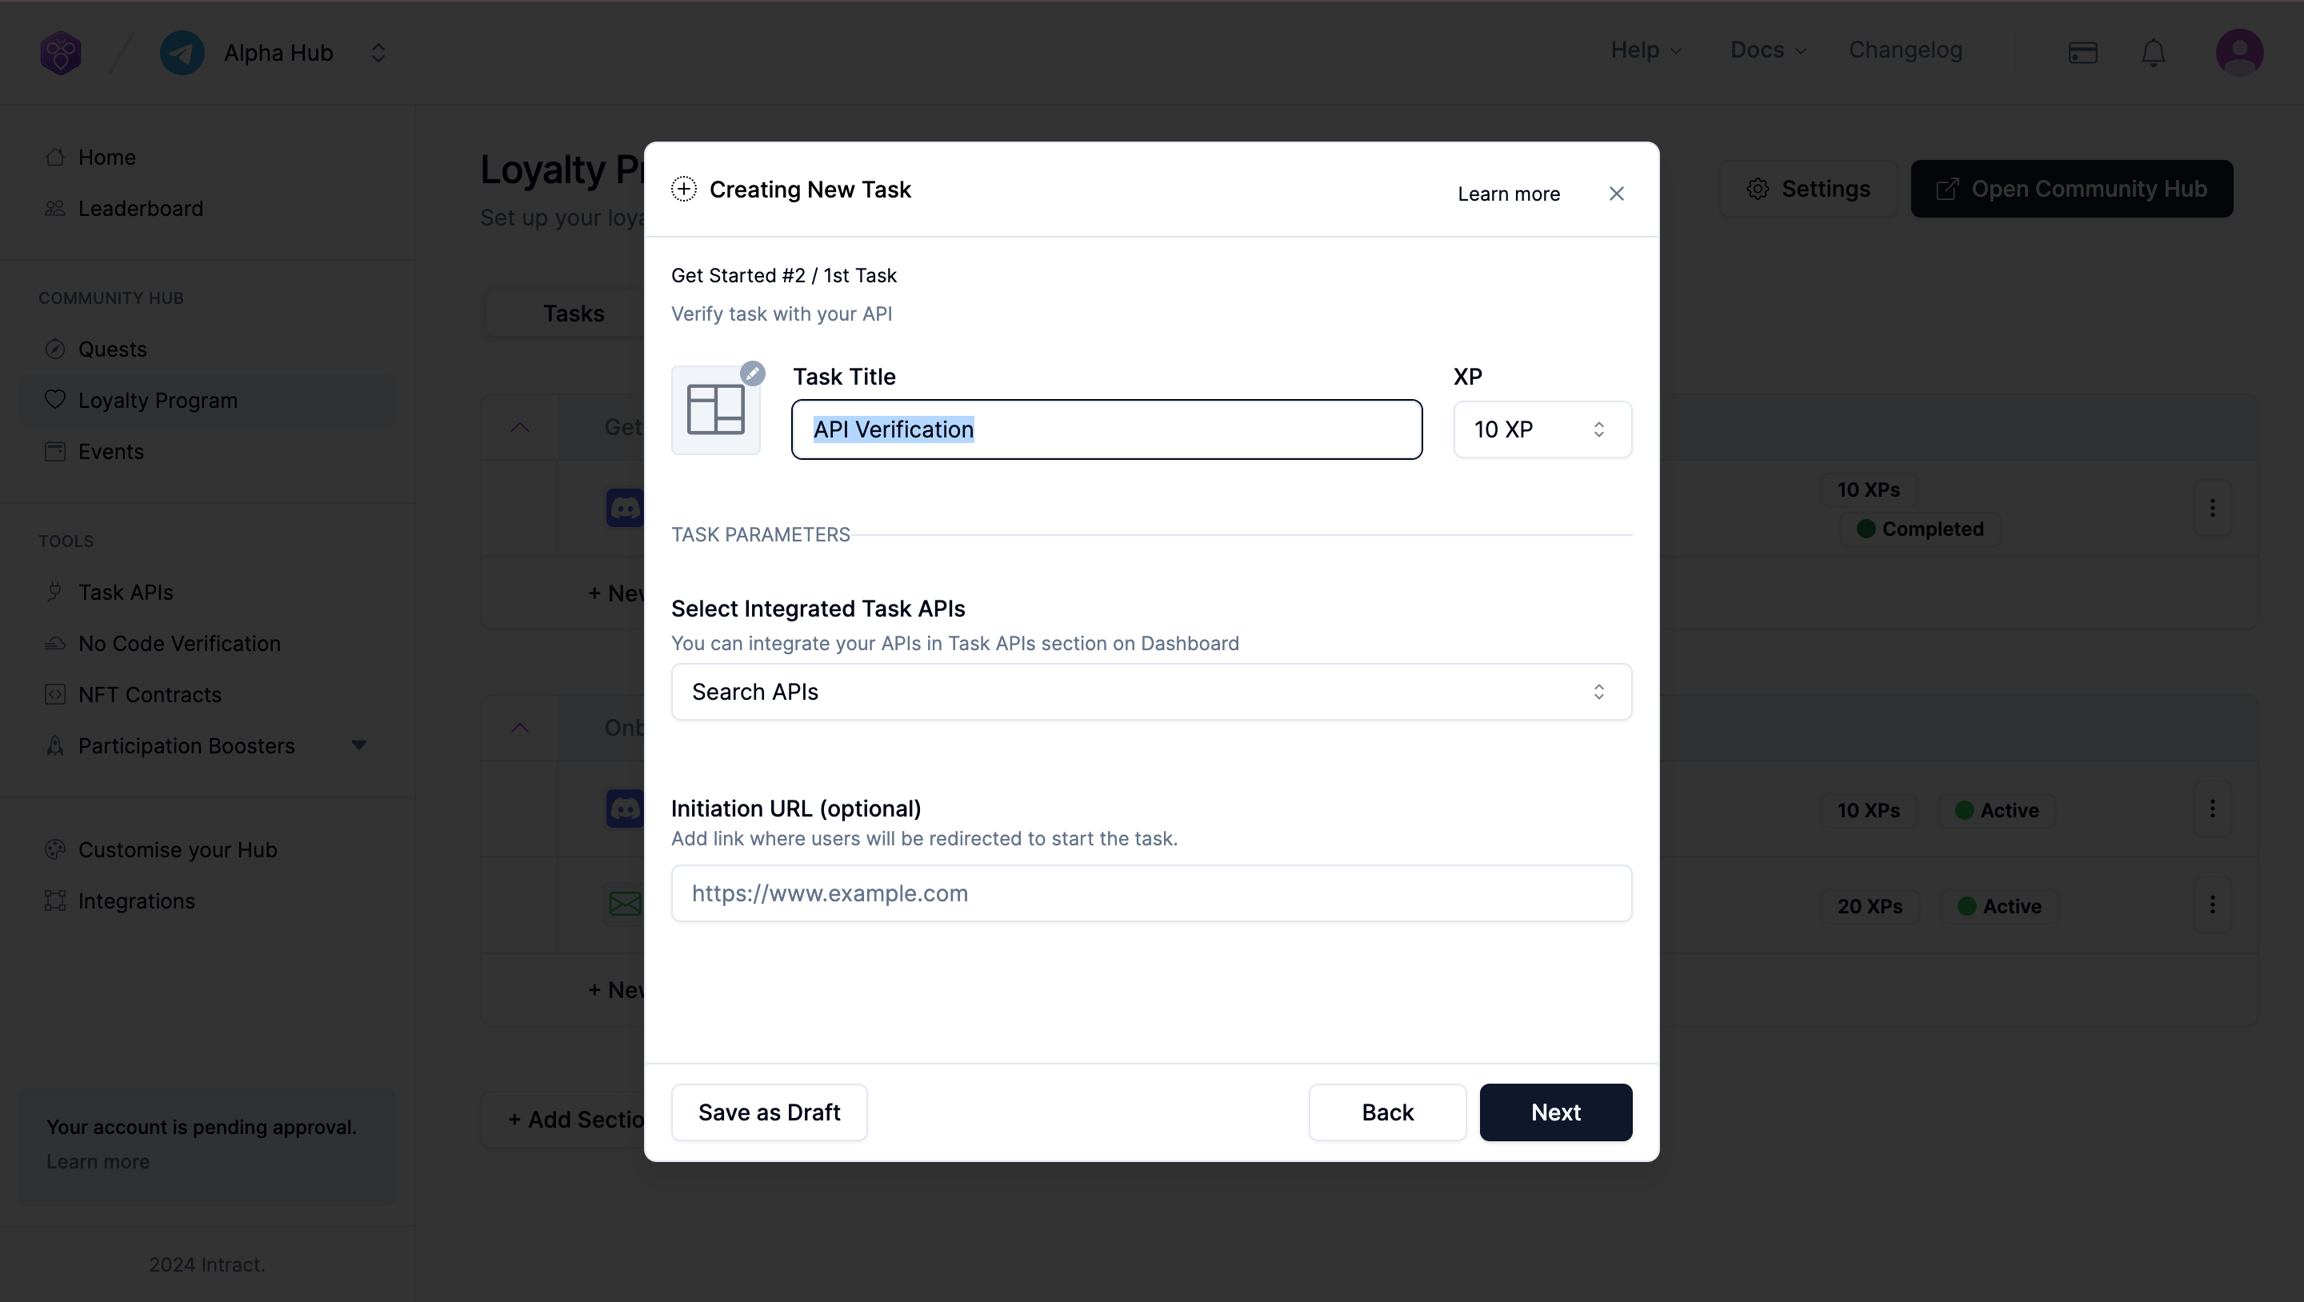
If you've already integrated the APIs, that's fantastic! Now you just need to add a task title, decide how many XPs you want to award per completion, select the API for task verification, and add an optional initiation link. This is where your users will be directed to complete the task.
Once you've finished this step, you're all set to add educational content slides! These will help your users understand the task better. Also, you can set recurrence for tasks. This means you can decide how often a user can perform the same task. Just remember, this option is only available for recurring tasks and not for one-time tasks like 'follow this account'. Because, you know, how many times can you follow the same account?
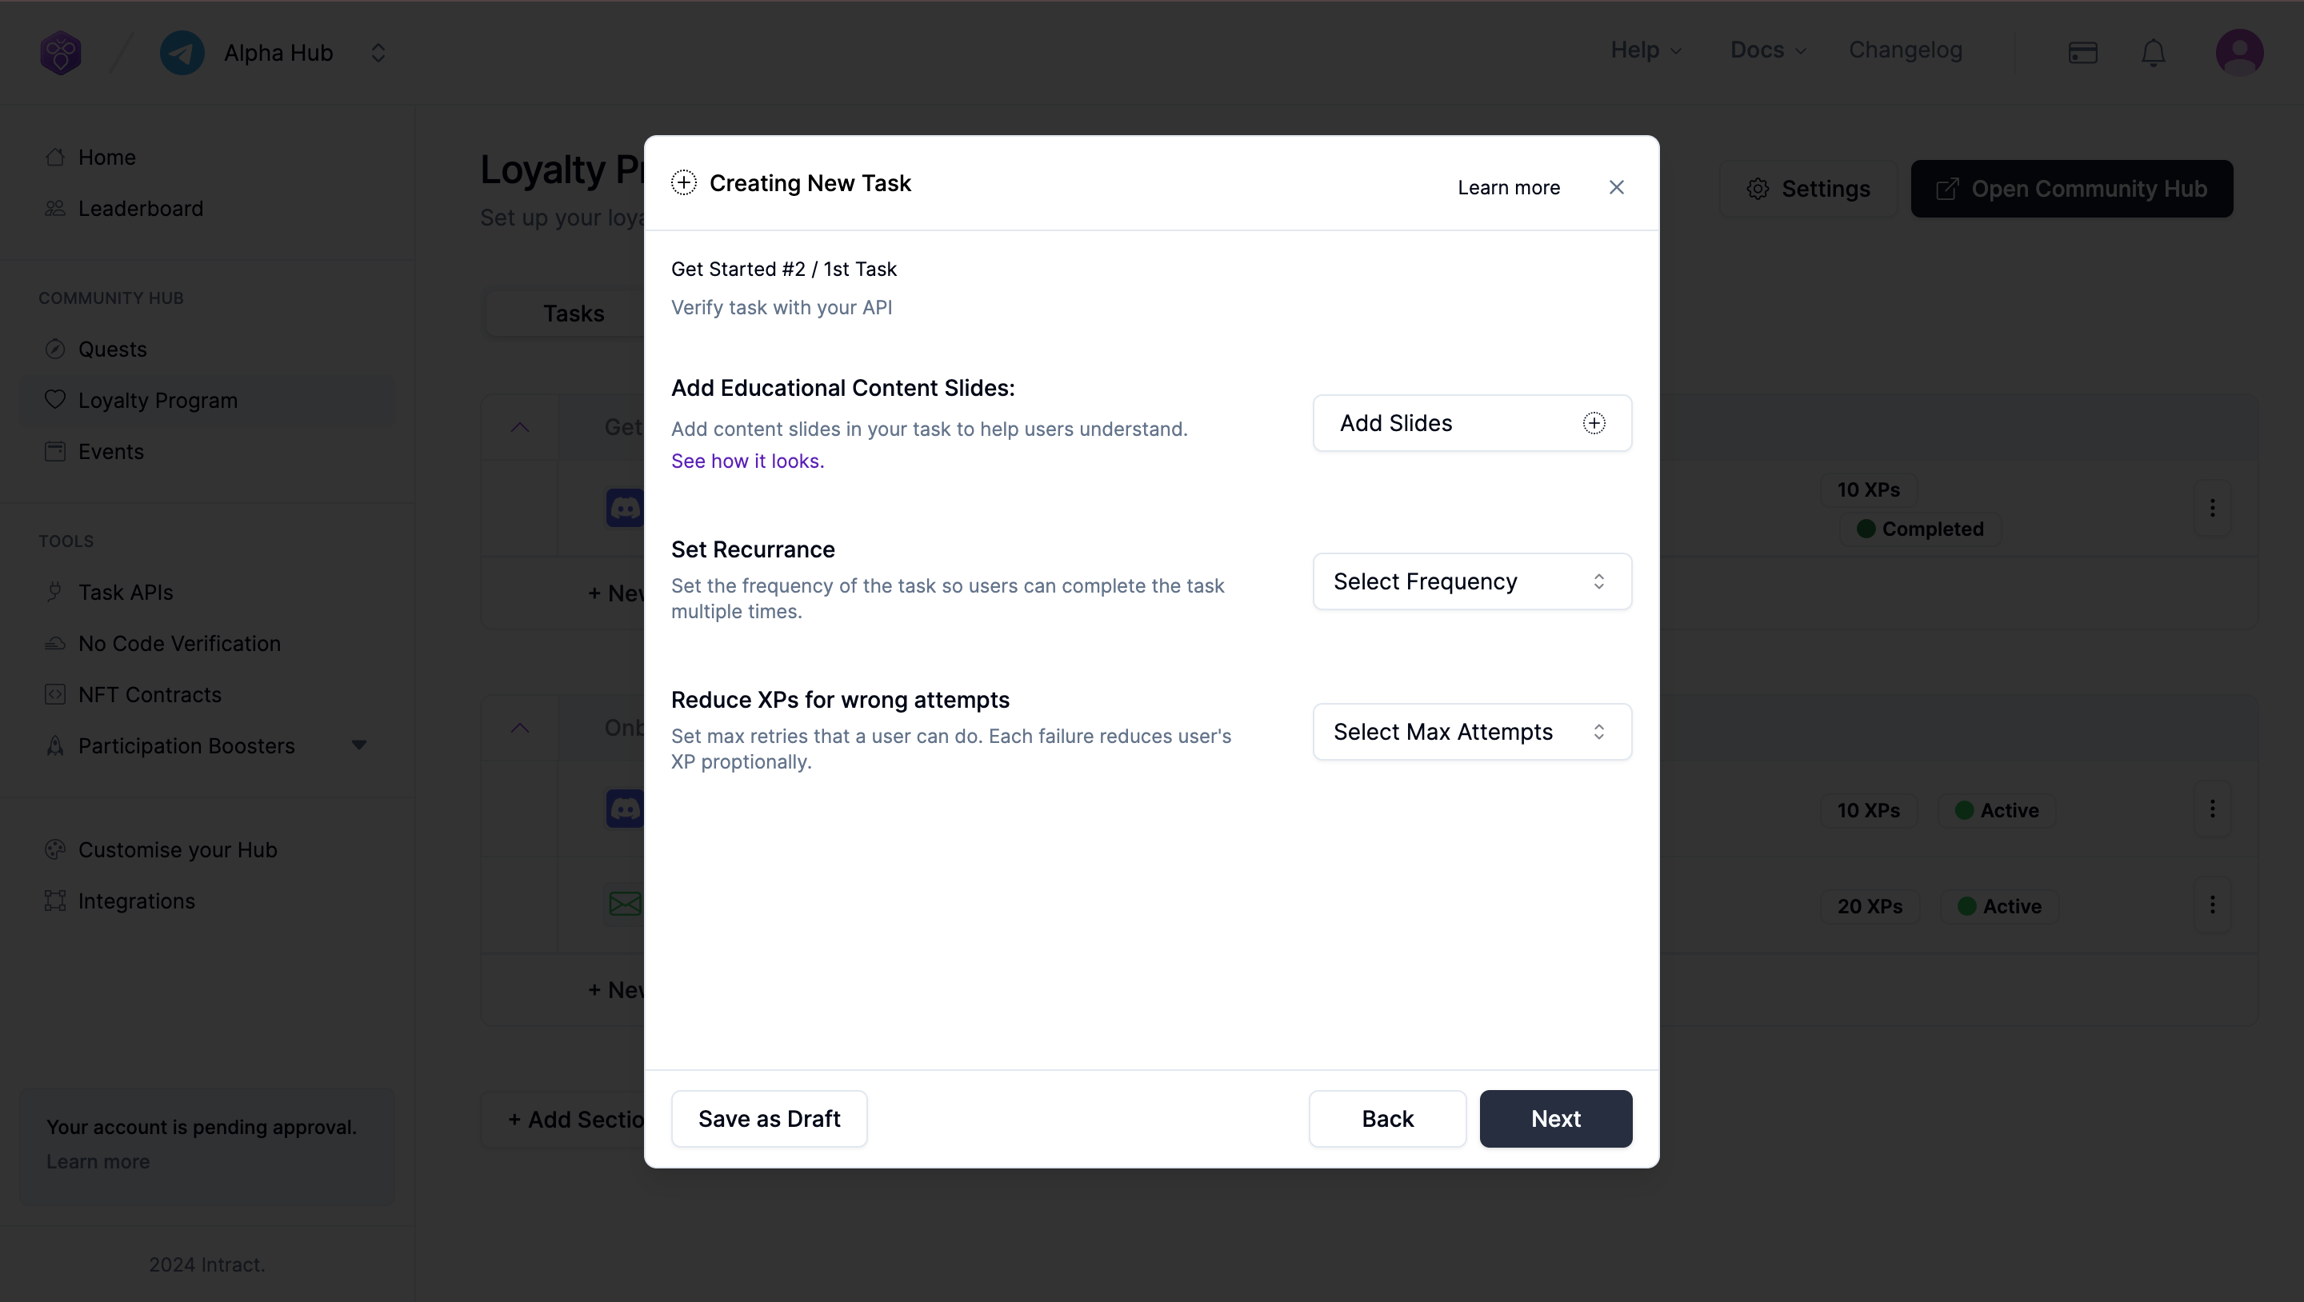
You can also reduce XP for incorrect attempts. So, if a user gets it right in the first attempt, they could get X number of XPs, but on the second attempt, they could get X minus a few XPs, and so on.
Next up, just pick your task duration. Your task needs to have a start date and time. It can have an end date and time, but it doesn't have to - this task could continue till the end of time if you want it to!
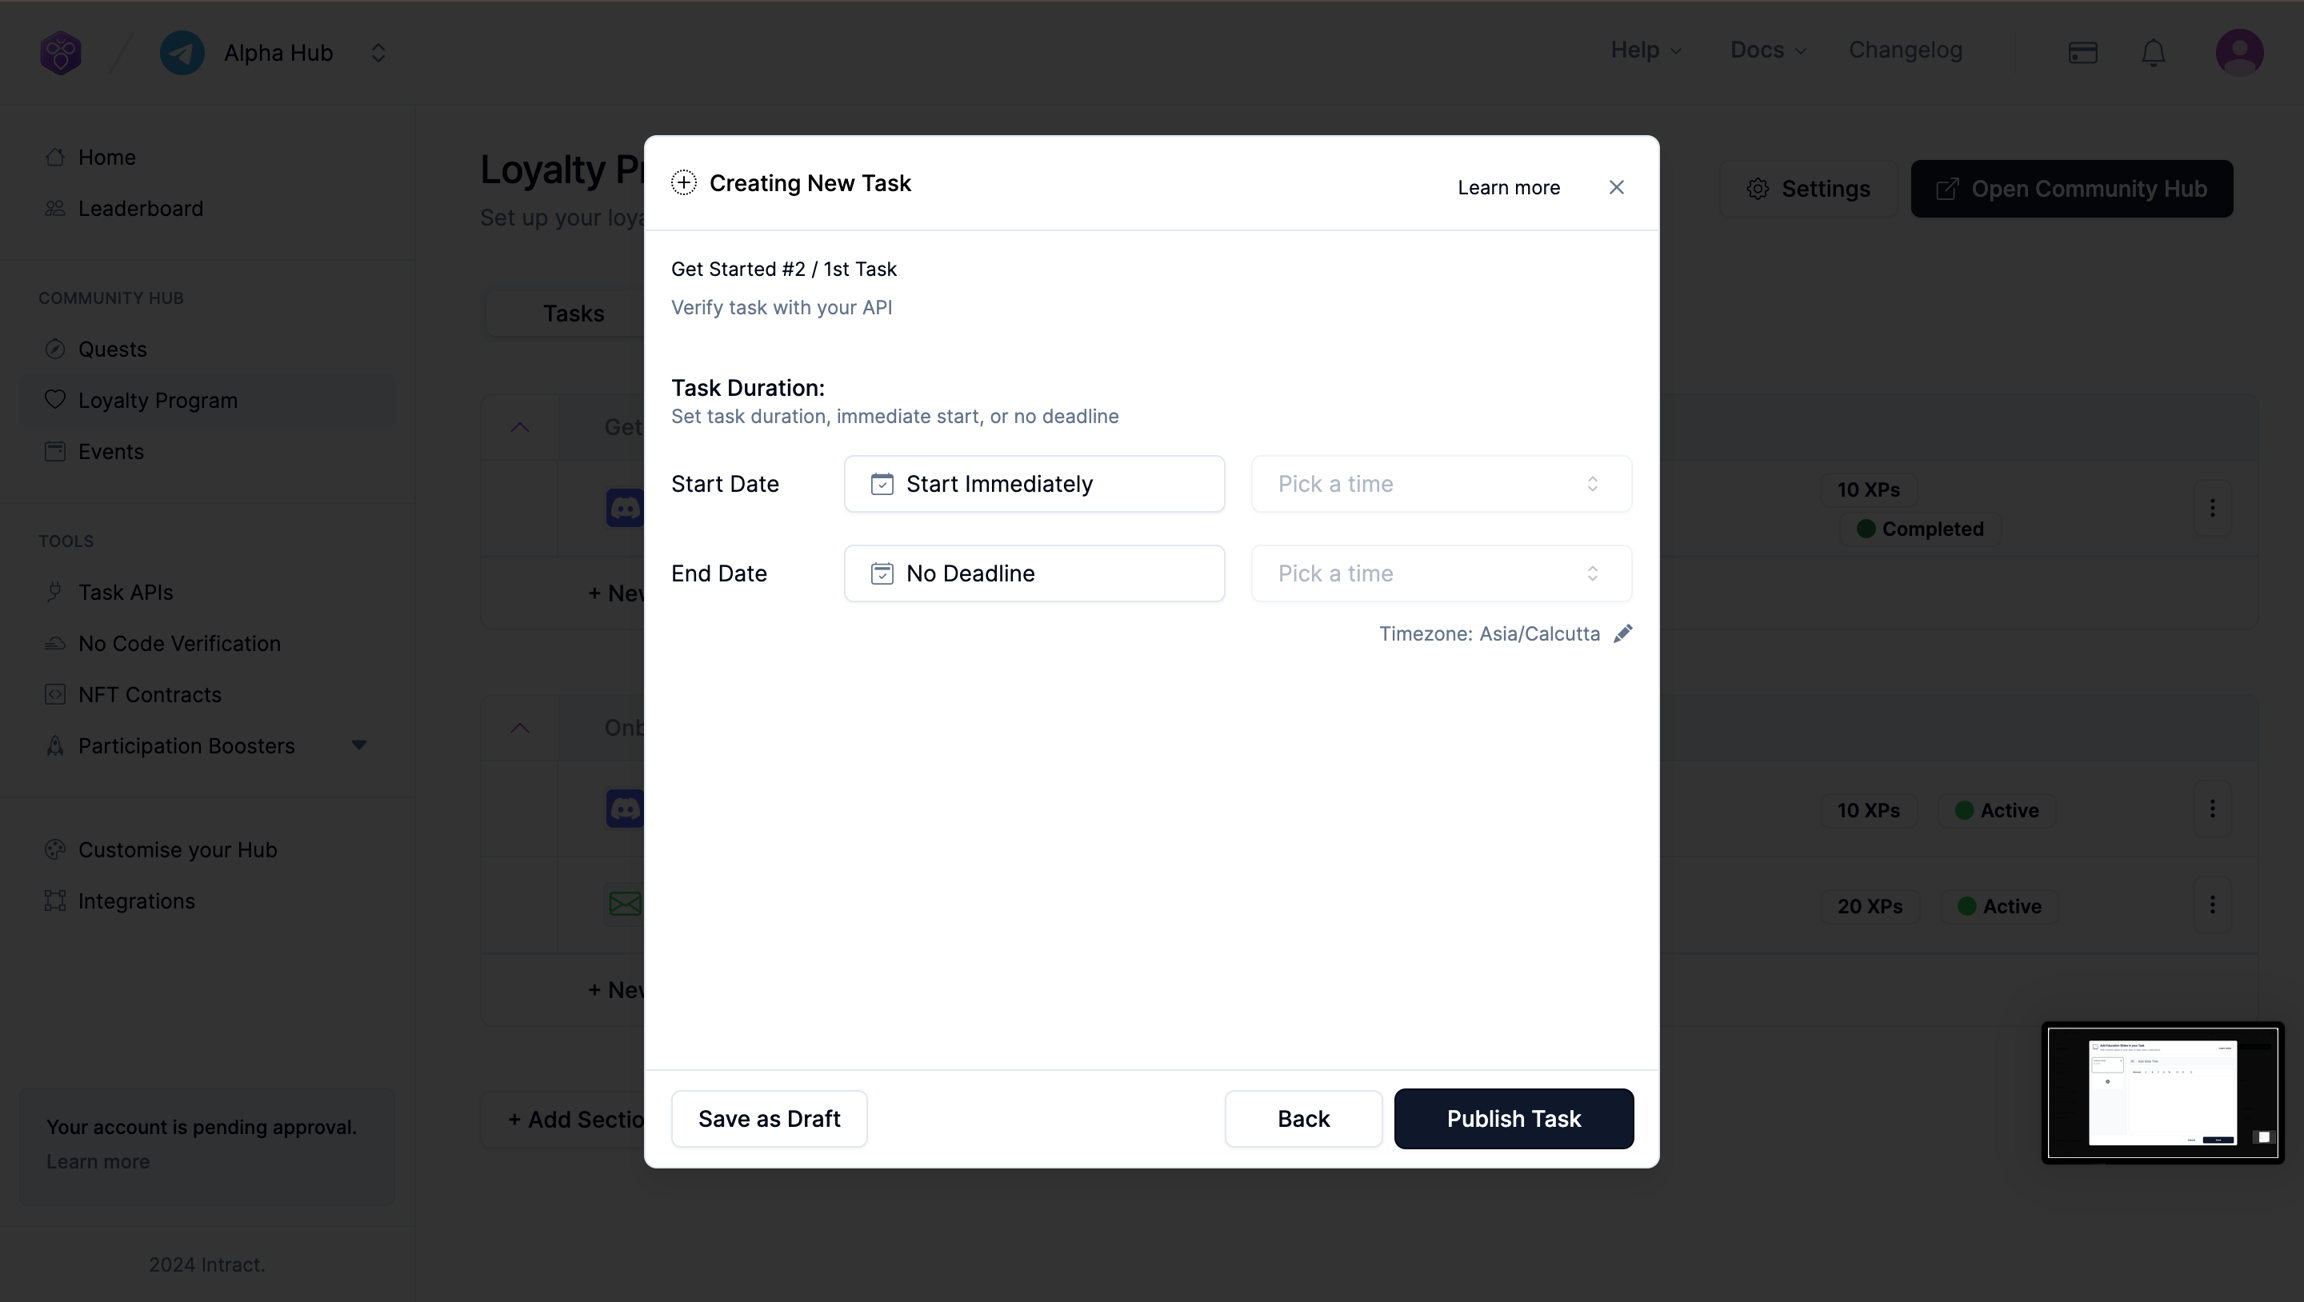
Once all of this is done, you're ready to publish your task. And don't worry if you're not ready just yet, you can save it as a draft at any step and edit it later when you're ready to publish. You'll find it super easy to drag and adjust the tasks and segment them better later. Plus, you can edit and duplicate tasks if you need to. Happy tasking!
Last updated